The Best Chocolate Chip Cookies Ever!

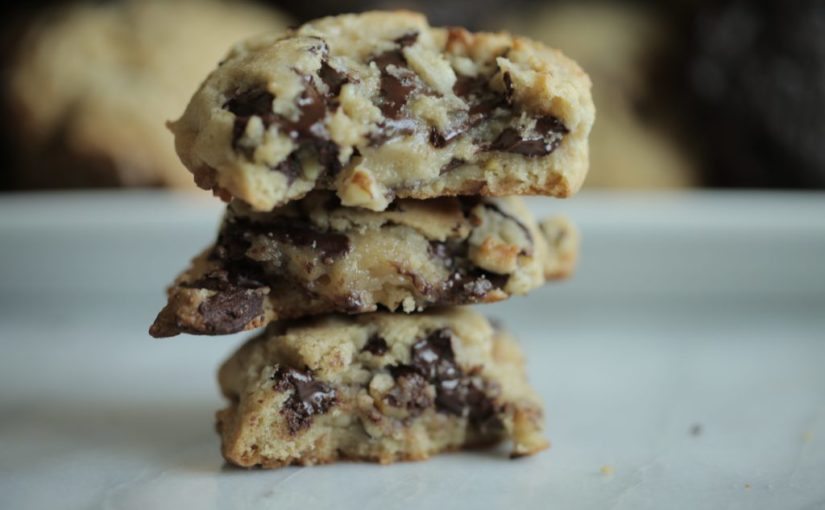
IMG_9667Have you ever had a cookie where you had an aha moment that you need this delicious butter laden pastry in your life multiple times a year? Well, that’s how I felt when I tried a famous Levain Bakery Cookie from NYC. In my past several visits to NYC, Levain has been on my list among many places to try. For some reason or another, we never were able to make it.

My in laws paid a visit recently to the bakery and were nice enough not to devour every cookie they purchased.  Upon my request, they brought back 2 cookies for my husband and me. After several days of being baked, they were STILL good! I couldn’t believe just how good they were so I decided to recipe test to get the closest version possible.

My awesome & talented blogger friend, Erika, aka The Pancake Princess, came over one day to help test recipes. After 4 hours, we found, then perfected the best copycat recipe. The key points are to make the dough balls pretty large, it doesn’t work well on tiny dough mounds; shock the dough at a high temperature cooking the outside while keeping the inside undercooked; using high quality ingredients ie: european style butter, and freezing the dough mounds before baking.

If you want to please your guests, these cookies are a must! I took them to a party that night and some people, no joke, got vicious! I noticed the plastic wrap pulled back around the plate with cookies missing before dinner was even served!

Levain copycat 1 levain copycat 2
Print Recipe
The Best Cookies Ever!
Course Dessert
Prep Time 20 minutes
Cook Time 9-1'
Passive Time 35 minutes
Servings
15
Ingredients
Course Dessert
Prep Time 20 minutes
Cook Time 9-1'
Passive Time 35 minutes
Servings
15
Ingredients
Instructions
  1. Preheat oven to 410 degrees.
  2. In large mixing bowl, cream together cold cubed butter, brown sugar, and sugar for 4 minutes or until creamy.
  3. Add eggs and vanilla, one at a time, mixing well after each one.
  4. Sift all dry ingredients together in a separate bowl: flours, cornstarch, baking soda, and salt. Mix until just combined to avoid over mixing. Stir in chocolate chips and walnuts.
  5. Scoop dough onto cookie sheet with a 2.66 oz scoop. Put in freezer for at least 30 minutes or until frozen.
  6. Bake for 9-11 minutes on the middle rack of your oven.
Recipe Notes

For best results, use 2.66oz scoop (volrath green scoop)

Cooking Lesson

View More: http://smithhousephoto.pass.us/smithhousestyledshoot
A while back, I teamed up with The Helpful Host to create a beautiful yet informative cooking lesson. Christina, from, The Helpful Host, curated the design and paid close attention to details which swooned all of the classmates (including me too!). The moment I walked in, the kitchen was set up with a place for each person, it was so adorable. Not only did she lay a nice wooden cutting board down but she had a little basket that had all of the gadgets they needed.

Her help allowed me to focus on what I’m good at, the food! This particular class was about the basics, enhancing knife skills, seasoning to perfection, and piping. We made a fresh Greek salad, French onion soup topped with crusty French bread and gruyere, mini vanilla cupcakes and a whipped cream cheese frosting. We had such a great time cooking and learning while sipping on some champagne :).

On a side note, I want to express how much I love teaching classes. I honestly never thought I would enjoy it but coming from 2 teachers in my family, I should have realized it sooner. I love to share my joy for cooking and help my customers hone in on their skills. If you want your very own personalized cooking class with me/us, contact me!

Screen Shot 2016-08-03 at 12.11.58 PM Screen Shot 2016-08-03 at 12.12.35 PM View More: http://smithhousephoto.pass.us/smithhousestyledshoot

Photos Courtesy of Smith House Photography

The Tiny Tea Party

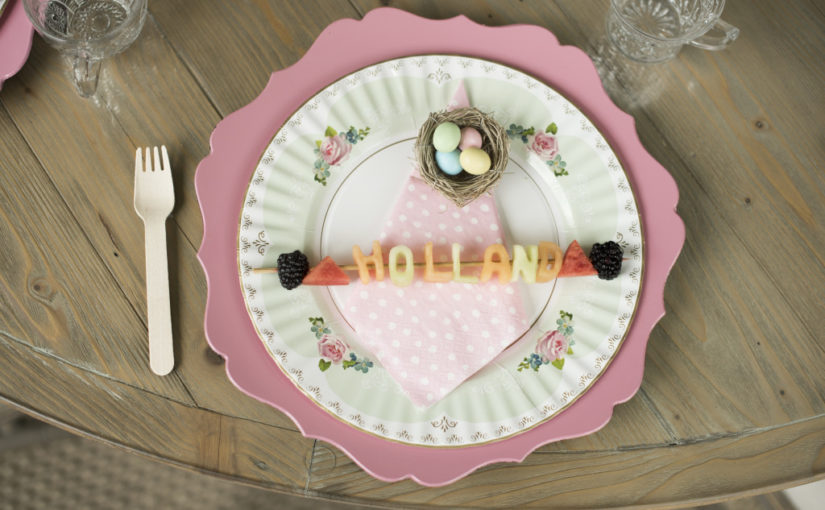
Fruit Name Kabobs TheFoodieChefA few months ago I was approached to cater a kid’s tea party. From the moment I got the call, ideas flooded me with sprinkle everything! I had been eyeing something called Fairy Bread for quite some time and now was my chance to make it. Not to mention these fruit kabobs have been bookmarked in my browser for months now! Creating this menu was so fun and a great chance for colorful creativity.

Jessica, from Paperhearts Photography, took the following photos and hosted the adorable party with a few of her friends. They styled the table perfectly and I seriously wish I could have been a guest when I was 6 years old (or now)!

The menu consisted of name fruit kabobs as place settings, triangle shaped pb&j tea sandwiches, rectangle shaped turkey and cheese tea sandwiches, fairy bread, fairy bites, and vanilla cupcakes with cream cheese frosting and sprinkles.

Paperhearts Photography The Foodie Chef PB&J Triangles The Foodie Chef Heart Shaped Fairy Bread The Foodie Chef Fairy Bites The Foodie Chef Vanilla Cupcakes with Cream Cheese Frosting & Sprinkles The Foodie Chef

Fairy Marshmallows

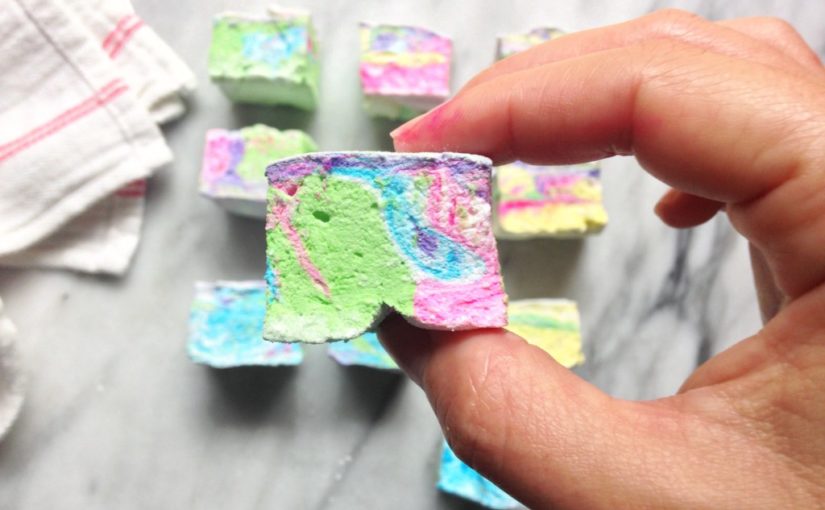
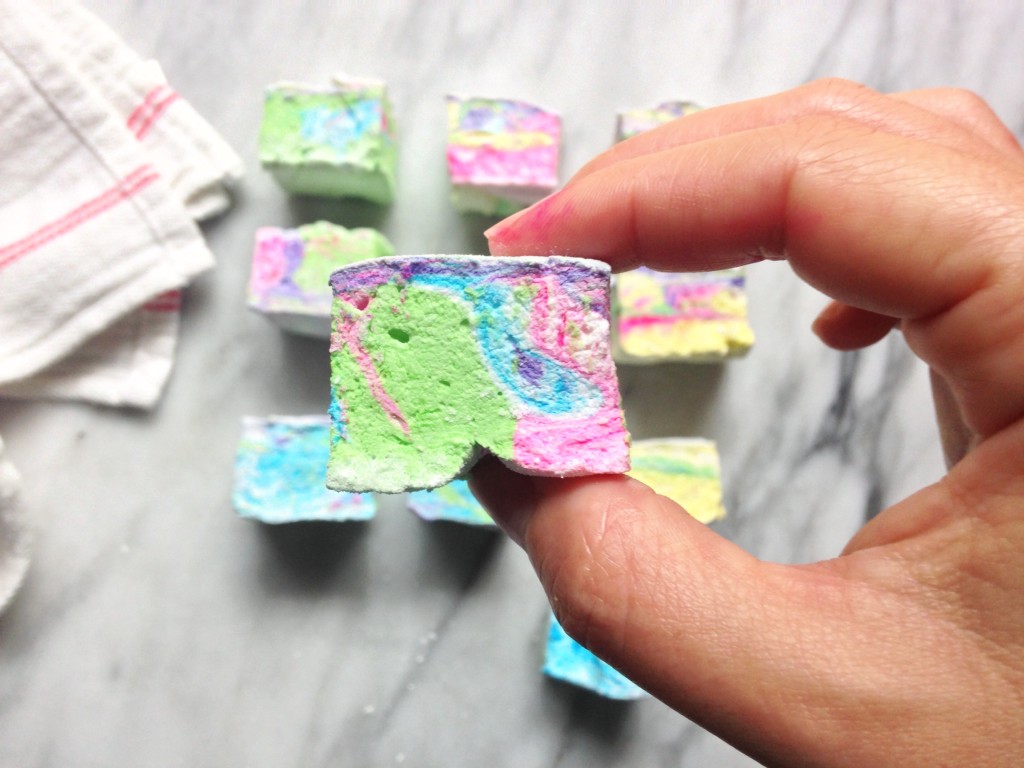
TFCMarshmallows4I have to be honest. I was scrolling through instagram (my usual thing) and was really inspired by a picture of rainbow marshmallows. I was busy so I put my phone down and forgot about them. Two days later, I couldn’t stop thinking about these marshmallows and how pretty they were. I searched for an hour on instagram and couldn’t find them. I was going completely crazy. I then started going to feeds where I thought it might be. It was then that I FINALLY found the rainbow marshmallows! Thanks, Naomi from Baker’s Royale. I have followed you for many years now and love love love your work.

These colorful, squishy, pretty and fantastic globs of love are perfect for kids parties, easter, and more! I gave them to my little nieces who gobbled them up with HUGE smiles on their faces. A friend of mine even said they tasted better than the kind you buy at the store, thanks, Jenn! 🙂 Anyway, they’re a must and pretty easy to make. The only drawback are the dishes, womp womp…
TFCMarshmallows1
Print Recipe
Fairy Marshmallows
These colorful, squishy, pretty and fantastic globs of love are perfect for kids parties, easter, and more! I gave them to my little nieces who gobbled them up with HUGE smiles on their faces. A friend of mine even said they tasted better than the kind you buy at the store, thanks, Jenn! 🙂 Anyway, they’re a must and pretty easy to make. The only drawback are the dishes, womp womp…
Prep Time 25 minutes
Passive Time 8 hours
Servings
4
Ingredients
Prep Time 25 minutes
Passive Time 8 hours
Servings
4
Ingredients
Instructions
  1. Lightly cover a 9×13 pan with nonstick spray; line with parchment paper. (This will help keep the parchment paper in place).
  2. Pour 1/2 cup water into a stand mixer bowl fitted with the whisk attachment. Sprinkle gelatin on top. Set aside.
  3. In the meantime, put 1 cup water, sugar, and honey in a small medium saucepan over medium heat. Cook until sugar dissolves. Once sugar dissolves continue to cook the mixture without stirring until temperature reaches 240 degress F, about 12-15 minutes. Remove from heat and dip the bottom of the saucepan in a metal bowl filled with ice water and allow to cool to 210 degrees F. (this will happen very fast)
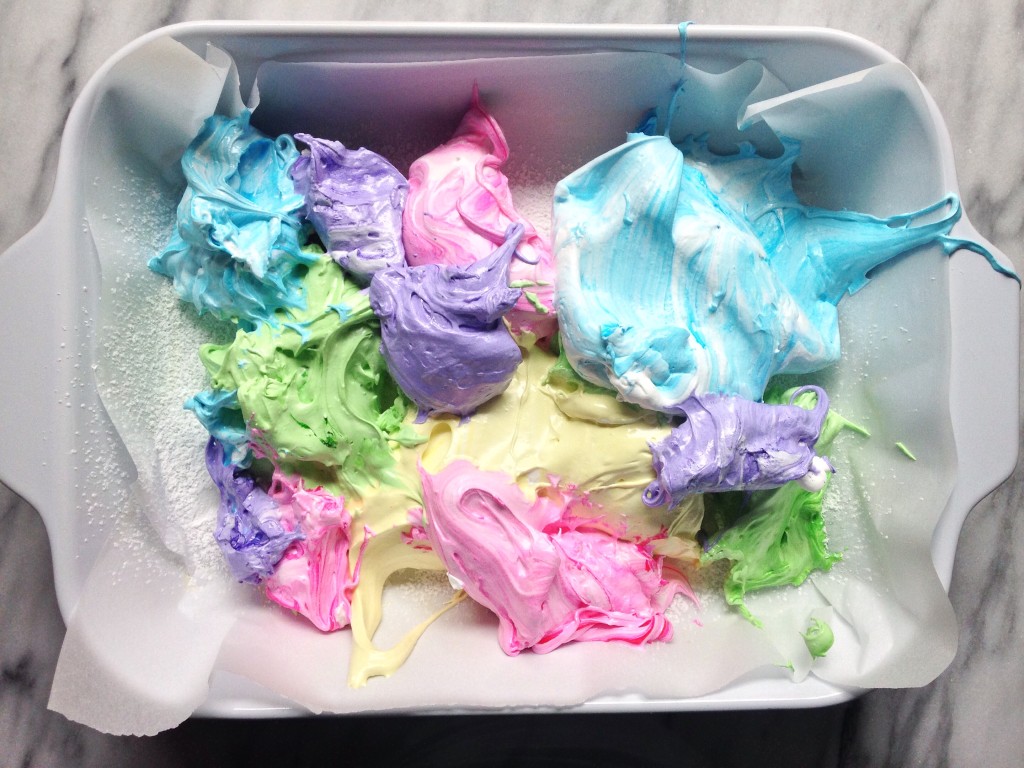
  4. Pour slightly cooled syrup mixture into gelatin mixture; beat on low until combined. Increase speed to high and beat until thick and fluffy and mixture triples in volume, about 10 minutes. Working quickly, divide mixture into four separate bowls and mix in food color (one color to each bowl). Using a lightly oiled spatula, scrape and layer each color into prepared pan. Using a lightly oiled knife or offset spatula drag and swirl it through the mixture to create a marbled effect. Do not over do. Smooth top surface (surface may not be completely even). Set aside in a cool place, (not the refrigerator) for 8 hours or overnight. Use a lightly oiled serrated knife and slice into 1 inch cubes. Cover cut sides with cornstarch and confectioner sugar mixture. Marshmallows will keep in an airtight container for up to 5 days.
Recipe Notes

-Have at least 3 spatulas on hand.

-Spray them with non-stick spray before even thinking about touching the marshmallows.

-When lowering the temperature of the candy mixture, put the sauce pan in a bowl of ice water- this will cool the whole amount faster.

-always. always, always use a candy thermometer and never under or over cook

-I like gel colors, not the liquidy watered down mess from the grocery store.