Two Nights away from closing..

Last night some friends and I went to Bootsies Hertiage Cafe to sample their 9-course menu before closing their doors in Tomball. This was my very first 9 course menu tasting so I didn’t have huge expectations. However, I was pleasantly surprised by the most interesting combinations, flavors, and textures.  That night was a first for many things including pig’s heart. Not only was the food different but they were playing dubstep in the background which totally added to the hip atmosphere. My friend Albert and I awkwardly took pictures throughout the dinner, the proof is below.

The Menu
The Beginning of Their Wine & Beer Pairing: Ginger Beer with Rose Hips
Pork and Green Onion Biscuits, heavenly.
Fried Pork Rind, Fromage de Tete aka Headcheese, Juniper Ash Meringue
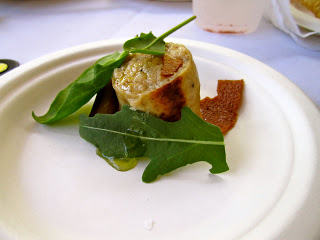
Smoked Pig Heart Brown Butter, Wood Sorrel & Radish
Gulf Blue Crab Cooked in Hay Kewpie, Unripe Trifolage Orange, Greenbriar Stems
Cultivated Mushrooms Chickweed, Caramel, Onion Blossom Vinaigrette &Sesame
Pork Liver Charred Onion Ver Jus & Aji
Smoked Trout Blistered Tomato & Soft Herbs in a Fish Fumet
Shiro Miso Noodles Mushroom Bouillon, Preserved Quail Egg & Coriander
Compressed Wild Boar Braised Daikon, Rose Hips & Cabbage Leaves
Classy drinks given to us by our neighboring table
Malted Brown Barley Pandan, Chocolate & Oats
View of the kitchen from my seat
Plum infused vodka with whipped cream and basil
Pickled Plums Lemon, Sassafras, Yogurt, Almond & Jasmine
Red Bean Paste Chocolate Truffle
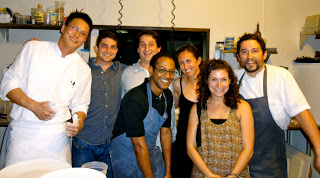
My Friends and I with Chef Randy Rucker & Pastry Chef, Chris Leung

Until the next tasting menu..
Food Truck Amazingness

Food trucks, thankfully, are becoming a hit in Houston. There just so happened to be the first food truck festival in Houston a few months ago. You better believe I was first to buy a ticket in excitement.  It ended up being chaotic to say the least. It was super hot out and the lines were just ridiculous. We waited 2 hours for tacos that we didn’t even end up getting. However, the food we did have was outstanding!

Dirty Fries from Zilla (fries, mac n’ cheese, cheetos)
Fried Chicken and a Waffle

Since we’re on the Food Truck subject, here are some pics from Austin’s own Ms. P’s Electric Cock Food Truck.

Truffle Mac and Cheese (didn’t taste truffle…)
Fried Chicken with pickled veggies, yum!
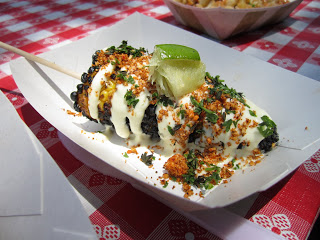
Grilled Corn on the Cob with Lime and Creama
Done and Done.

Coming soon: more food truck pics!

Food Event at Haven

My friends and I attended the Hats off Event at Haven a few weeks ago. I apologize for the lack of posts lately, I have been working a lot in the Bake Shop. It’s been fun but I am always able to fit fun food events into my schedule.

The following was not only beautiful but delicious! I forget which restaurants paired with each food item so help me out of you remember. Now, be my guest and drool over the pictures, please 🙂

Tuna Tartar from The Modular
Rabbit Confit
Beef Cheek from Feast
Lovely Friends
More Lovely Friends enjoying the food
Grilled Okra
Seared Scallop with Foie Gras and Candied Rhubarb
Pate with Peach and Pickled Onions
Salted Caramel Ice Cream with Fudge and Sponge Cake from Bootsies
Bologne Sandwich from Underbelly
Quail legs with dumping
Wipe the drool off of your lips… hehe. The over all consensus of the best item between my and friends and I were very close. Most enjoyed the dessert because it was the last taste in their mouths- not fair! I enjoyed the seared scallop the most, the many textures and flavors that were involved make my mouth water now thinking about it.

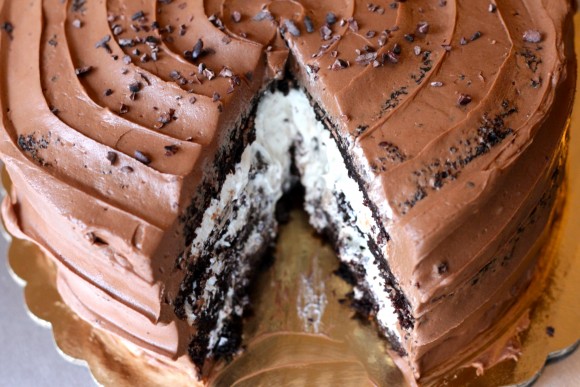
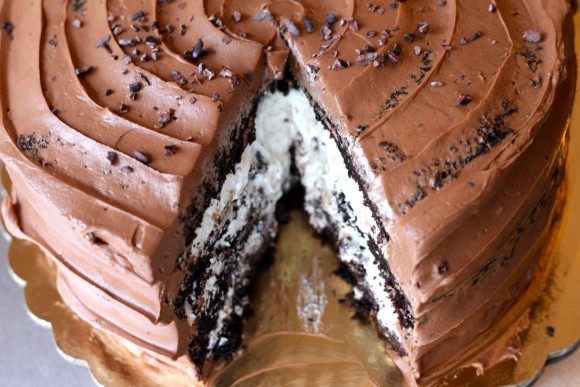
Chocolate Toasted Marshmallow Cake

A few months ago I came across a great cake blog. The blogger made this amazing toasted marshmallow cake, I just had to make it!  My lovely boyfriend, owner of Cut to Create, filmed me making this extremely tasty cake. The chocolate cake part is by far the best recipe I’ve come across, it’s very moist and chocolatey.

Dutch processed Cocoa vs. regular Cocoa Powder? There’s an on going argument that dutch processed cocoa powder is better than regular cocoa powder.  In school, I learned that dutch processed cocoa is treated with an alkali to neutralize its acids. If your point is to get the darkest chocolate cake, add a little white vinegar to the mix. It’ll deepen the color to your liking.

Yes, I know I have small hands 🙂 In the video, I use two different sized marshmallows- you don’t need to follow that. I ran out of large ones and used what I had in the pantry. The small ones worked just as well.
IMG_2215


Print Recipe
Chocolate Toasted Marshmallow Cake
Servings
Ingredients
Servings
Ingredients
Instructions
Rich and Dark Chocolate Cake
  1. Preheat oven to 350 F. Prepare 3 x 8" cake pans with parchment paper. In bowl of standing mixer, sift all dry ingredients. Add all remaining ingredients to bowl with the dry ingredients and with paddle attachment on mixer, mix for 2 minutes on medium speed and pour into prepared pans. Batter will be liquidy. Bake for 20 minutes and rotate pans in oven (if not cooked in convection oven). Cakes are done when toothpick or skewer comes clean, approximately 35 minutes.
Toasted-Marshmallow Frosting
  1. Place marshmallows on cookie sheet lined with parchment paper. Place in the oven, and broil marshmallows until nice and brown. Keep an eye on them as they burn very quickly. Combine butter and icing sugar in standing mixer fitted with paddle attachment, on low until blended (about 1 minute). Add vanilla and mix on high for about 3 minutes. Add marshmallow cream and toasted marshmallows, and mix on lowest setting for about 1 minute.
Malted Belgian Chocolate Frosting
  1. In a bowl of a standing mixer fitted with paddle attachment, combine the powdered sugar and butter and beat on low speed for about 1 minute. Add vanilla and malt powder, and beat on low until well combined. Add the melted chocolate and beat on medium speed until smooth (about 2 minutes). Add whipping cream and beat on med-high speed for another minute. Best used right away. *The malted chocolate frosting isn't my favorite, It isn't bad though. I'm a lover of freshly made Swiss meringue or French butter cream, nothing compares to those two!

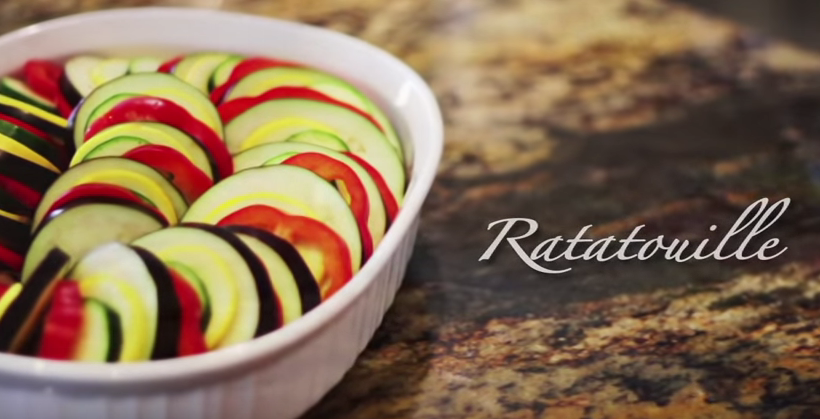
Ratatouille

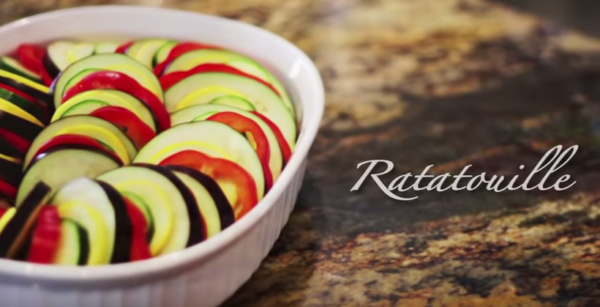
I felt inspired to make this classic dish after watching the pixar film, Ratatouille. I’ve never eaten the dish before but I wanted to try it out since it has such a pretty presentation.  I’m not the biggest fan of eggplant or red bell peppers but I wanted to make it the traditional way. The oh so talented people  at Cut To Create  put together yet another awesome video of me making the dish. Check it out below.

Print Recipe
Ratatouille
Servings
Ingredients
Servings
Ingredients
Instructions
  1. Start off by making the tomato sauce before prepping the vegetables. I usually make my own sauce but you can always buy a jar of prepared tomato sauce. Also, if you want to be fancy, you can make tomato concasse which are blanched, shocked, skins removed, and seeded. You can skip the work by buying a can of tomatoes that already have the skins removed. The next step is to just squeeze the seeds out, like I do in the video. I also do not use the juice in the can, it tends to have a metallic taste.
  2. Preheat oven to 400 degrees. Saute the onions and garlic in olive oil then season with a pinch of salt and pepper. Once the onions become translucent, add the tomatoes that have been seeded and drained. Cook for a few minutes until the flavors combine. Add 2 tsp of Thyme, bay leaf, tomato paste, sugar, and the wine. Cover and let simmer for up to an hour. I let it simmer while preparing the vegetables.
  3. *Hint on tomato paste: I found that when buying a small can of tomato paste, I never use the whole can. You can save it by spooning out a tablespoon onto parchment paper then freeze it. Once frozen, you can place them in a zip-top bag and use them as you please!
  4. While the tomato sauce is simmering, cut the eggplant, zucchini, squash, and red bell pepper in 1/8th inch pieces. This is best achieved with a mandoline but a sharp knife with consistent cuts works well too. Once this is done, add the cream to the tomato sauce and season with salt if needed.
  5. Add the tomato sauce to the bottom of the baking dish (remove the bay leaf) and spread evenly. Start by laying the vegetables in this order: eggplant, squash, zucchini, red bell pepper and repeat. Once it's layered, you can press down to make sure that it is tightly packed. To finish, season the vegetables with salt, pepper, thyme (1 tbsp), and drizzle with olive oil. Cover with foil or parchment and bake for 40-55 minutes. You will know it's ready when the tomato sauce is bubbly and the vegetables have given off their liquid. Serve hot, Bon Appetite!

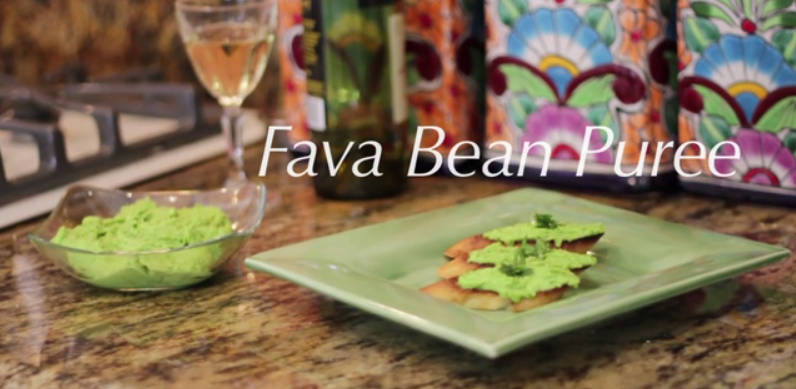
Fava Bean Puree

Fava beans are amazing legumes! They’ve been around for over 5,000 years and are staples in diets around the world. The beans taste meaty in texture yet smooth. They are fantastic for our bodies as they contain L-dopa (dopamine) which aids in memory and prevents Parkinson’s Disease. They are also high in fiber, protein, Vitamins A & C, and low in sodium. They’re pretty much a power bean. 

I was given an assignment in culinary class asking that I choose a vegetable and present it. Fava beans were my choice and that’s where the video came in. I was lucky enough to get my favorite creative people at Cut to Create to make this video of me making the dish.

The Foodie Chef Makes Fava Bean Puree from Cut to Create on Vimeo.

Print Recipe
Fava Bean Puree
Servings
Ingredients
Servings
Ingredients
Instructions
  1. Shell the fava beans, blanch them in boiling water for 5 minutes. Shock them in cold water then peel the outer shell off. The beans should come out to be about 1 cup (not much compared to the 2 lbs you just bought). Combine the beans, Parmesan, garlic, cilantro, lemon zest & juice, and blend in a food processor. While blending, slowly drizzle in the olive oil. After, add salt and pepper to taste.
  2. Substitutions You can sub cilantro for parsley or basil. Playing with these flavors will give you a tasty results. If using basil, it may taste more like a pesto without nuts or hummus.
  3. Tips These beans are quite labor intensive so get ready to work your hands for a good 30 minutes. I would recommend not using a really flavorful olive oil. The second time I made it, the oil gave it too much of an overpowering fruity flavor. Also, hold the salt until the end, real Parmesan tends to be salty by itself.
  4. Spread this lovely puree over a toasted sliced baguette, it's sure to please your taste buds! If you want to garnish, I recommend using something inside the puree: shaved Parmesan, cilantro leaf, a cooked fava bean, or lemon zest to add color. Enjoy!