Baked Stuffed Artichokes

Artichokes 2

I have to admit, I have been a little intimidated by the cook time of artichokes. I like quick and easy cooking but this was a nice little challenge. Growing up my mom would steam them for an hour or so. I just remember it taking so long and then there wasn’t much to eat after that long cook time. I never thought to bake them until now. So I searched for a recipe and adapted it to the one below. (they’re super easy)

The first thing I did was slice a quarter of an inch off the top exposing the inside leaves (first picture). In the second picture, you can see I separated the leaves leaving room to fill them with delicious cheesy goodness and garlic.

artichokes 1

Next, I filled them with the parmesan mixture, stuffing it in every crevice possible.

artichokes 3

Then fill the baking pan with hot water, cover with foil and bake.

artichokes 4
Print Recipe
Baked Stuffed Artichokes
Prep Time 10 minutes
Cook Time 1 hour and 15 minutes
Servings
Prep Time 10 minutes
Cook Time 1 hour and 15 minutes
Servings
Instructions
  1. Preheat oven to 425.
  2. Wash artichokes thoroughly then slice the bottom stem off letting it stand evenly.
  3. Slice 1/4 inch off the top leaves leaving them exposed. Then stretch open the leaves making room for the stuffing.
  4. Combine all ingredients except the lemon then stuff in between each leaf. After you're done stuffing, squeeze a spritz of lemon on top to preserve the color (oops I forgot to do that). Then drizzle olive oil on top of each.
  5. Place the artichokes in a baking dish and fill 1/4 of the way up with boiling water. Cover with foil and bake for 1 hour and 15 minutes.


Tour de Cali

Two weeks ago I met my husband in LA. I met him during his 2nd week working there (tough life) and we did a little traveling to central California. We rode along the PCH and I have to recommend it to everyone. It’s just so incredibly gorgeous. I want to live in Cali 🙂

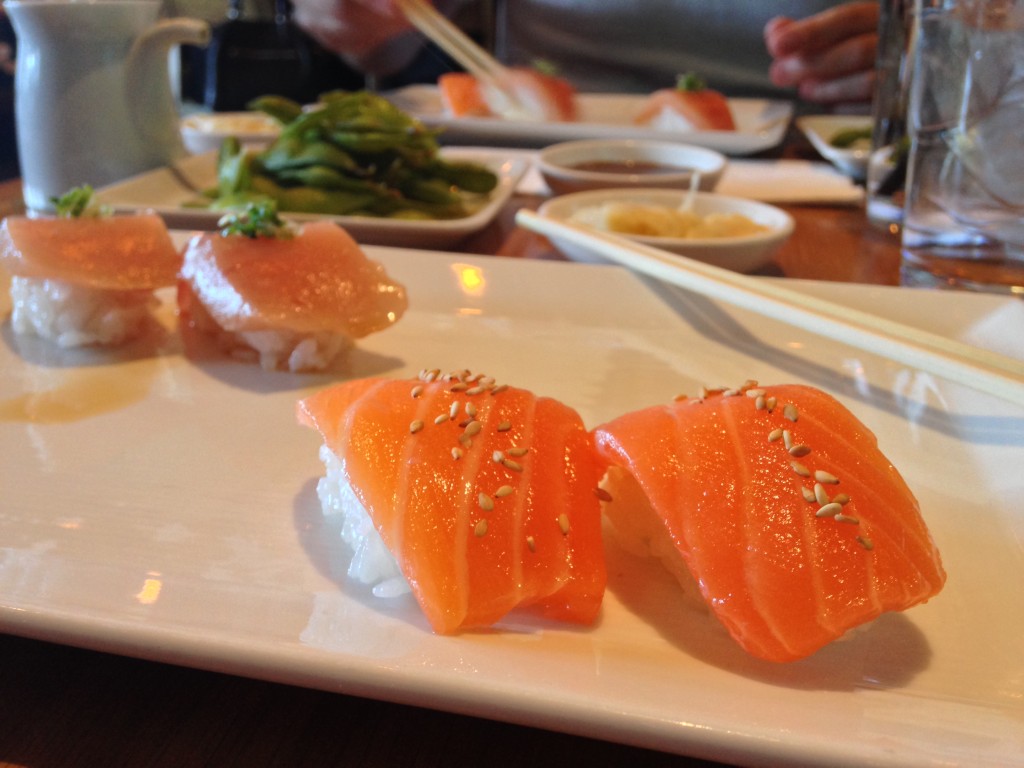
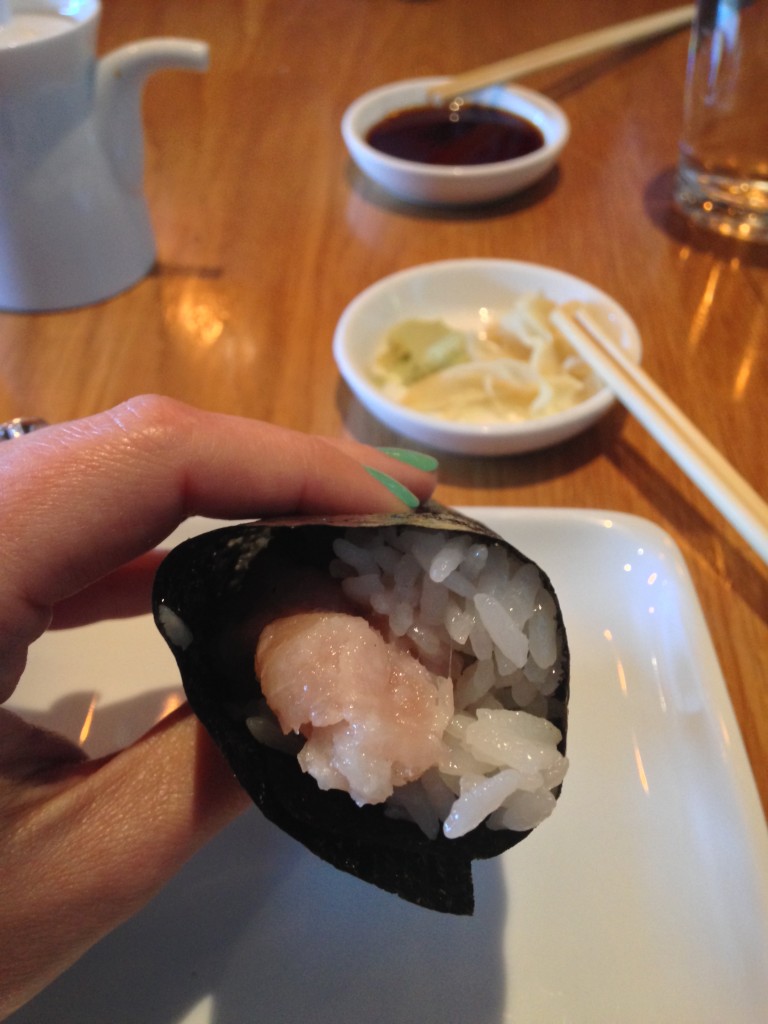
The moment I arrived in LA I needed Sugar Fish. If you haven’t been, you need to go. It’s just the best sushi I’ve ever had. We each got the Nozawa Trust Me (I had a big appetite). The fish is simple itself but it’s about the warm sticky rice paired with the cold fish. Pictured below are just a snippet of the tasting menu. I dream of this place…


Sugar Fish Sugar Fish

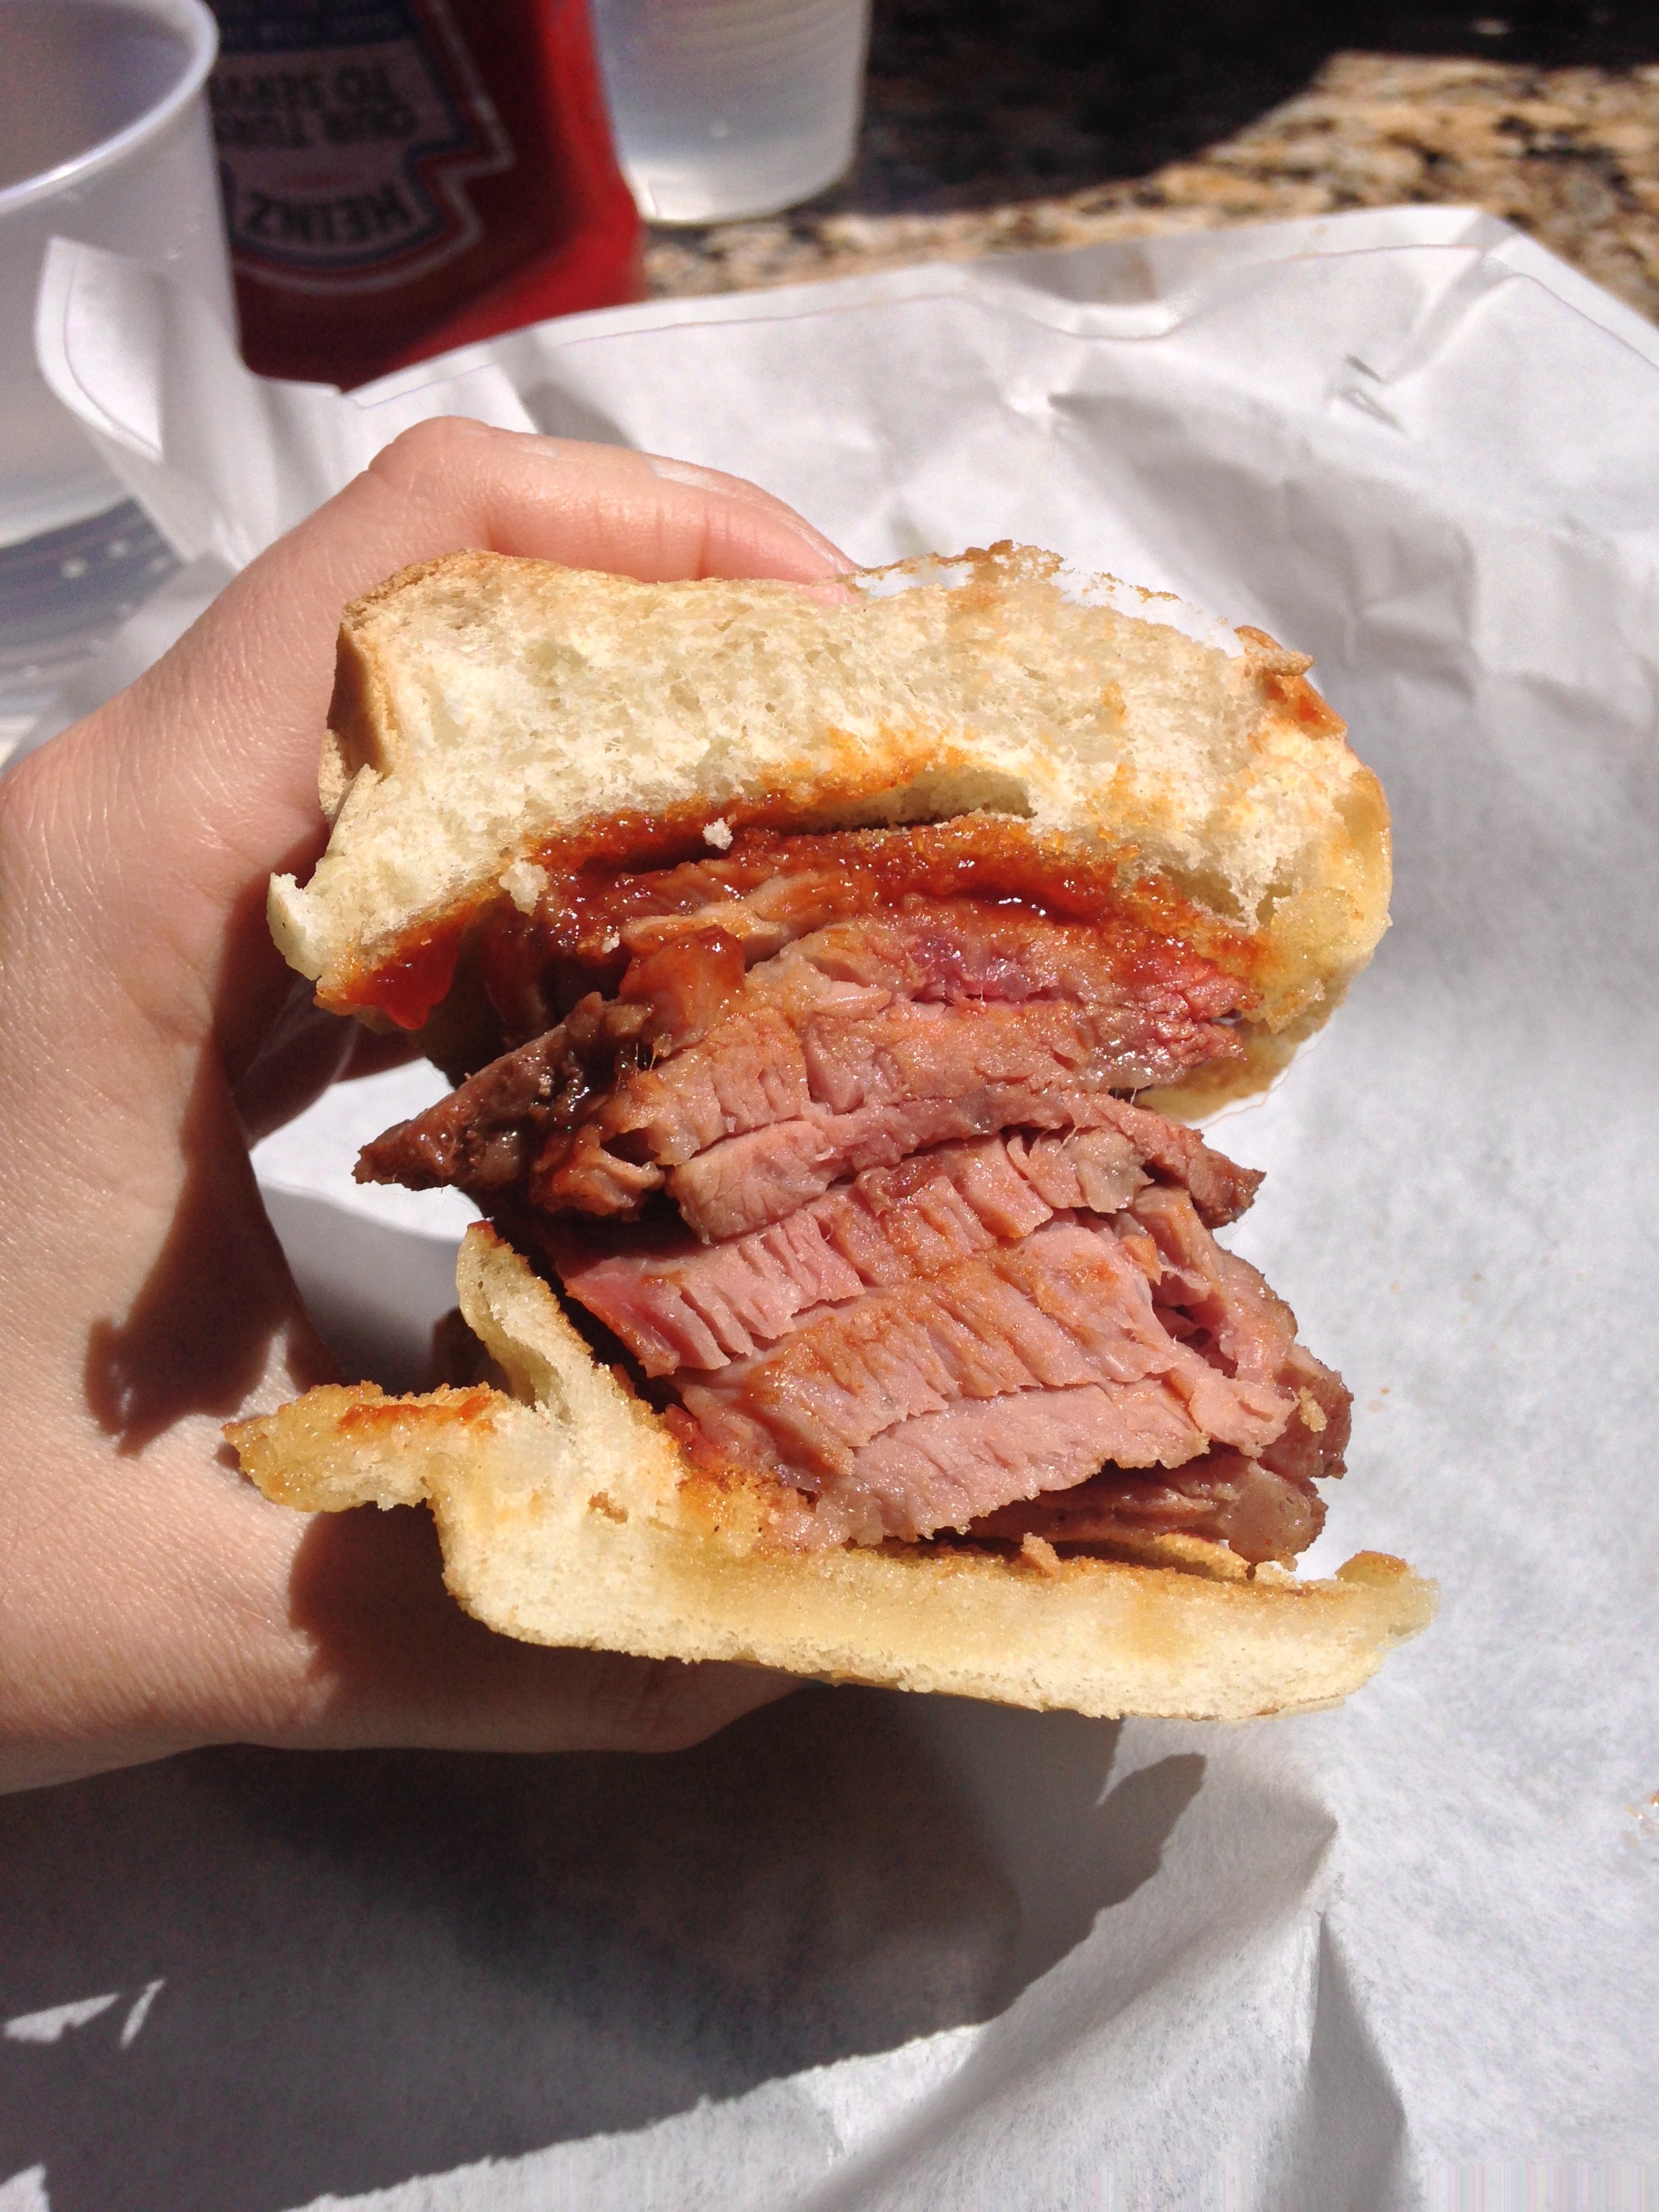
The next day we drove through SLO (San Luis Opisbo). It’s all about their tri tip sandwich and we found the best and busiest place in town, Firestone Grill. I much prefer Texas bbq but it was worth trying.

Tri Tip Sandwich

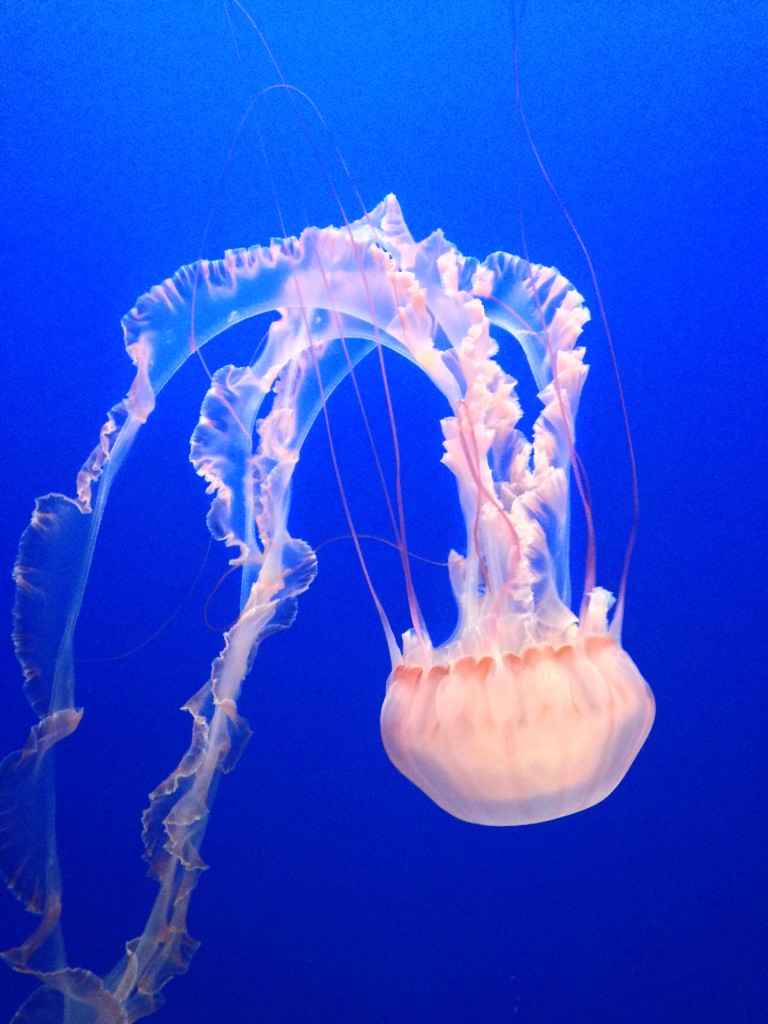
The next day we visited Monterey. We went to the famous aquarium which was really cool but filled with little kids running around, ah!

Monterey Bay Aquarium

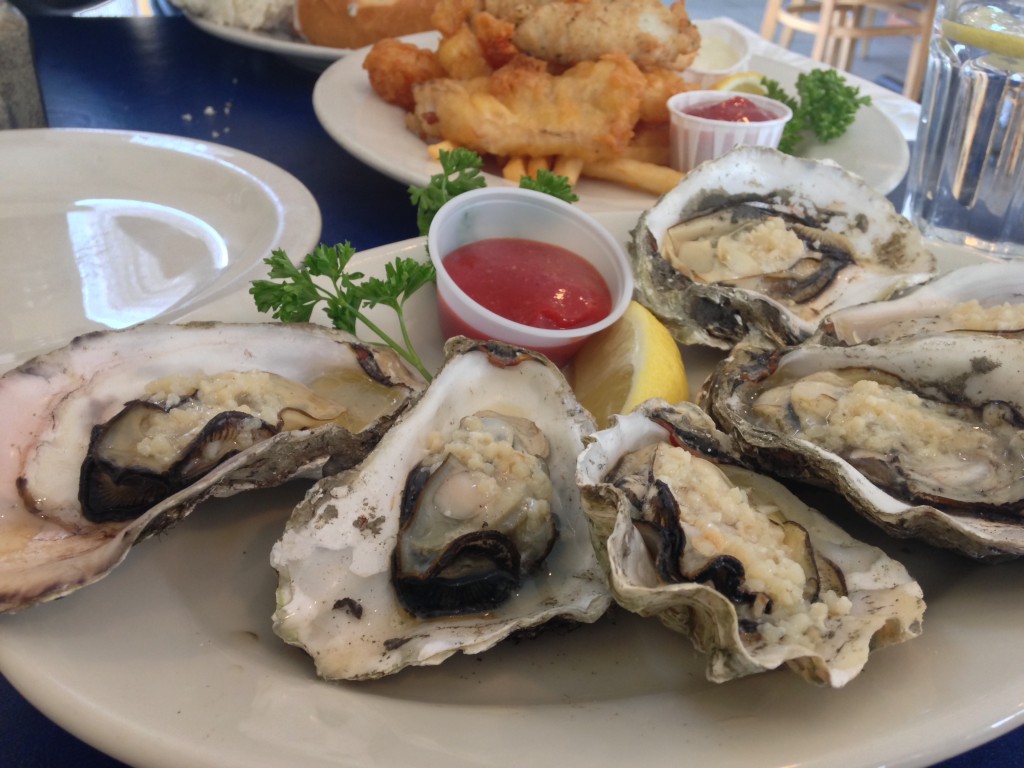
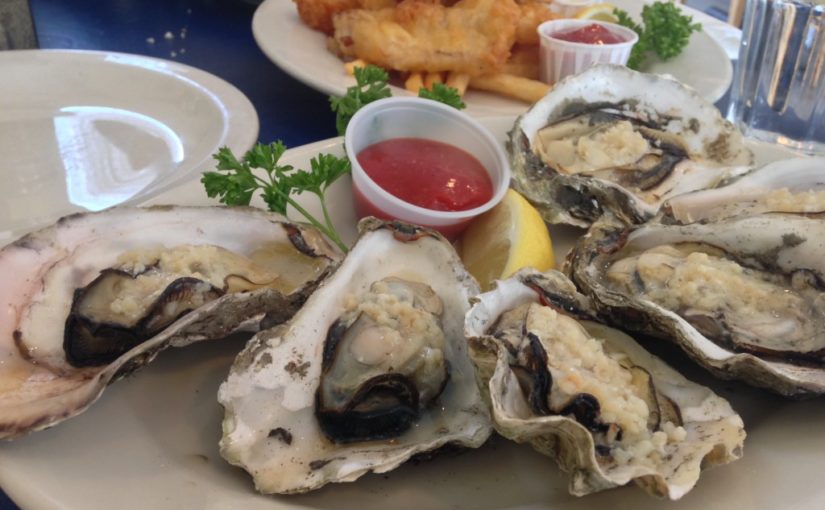
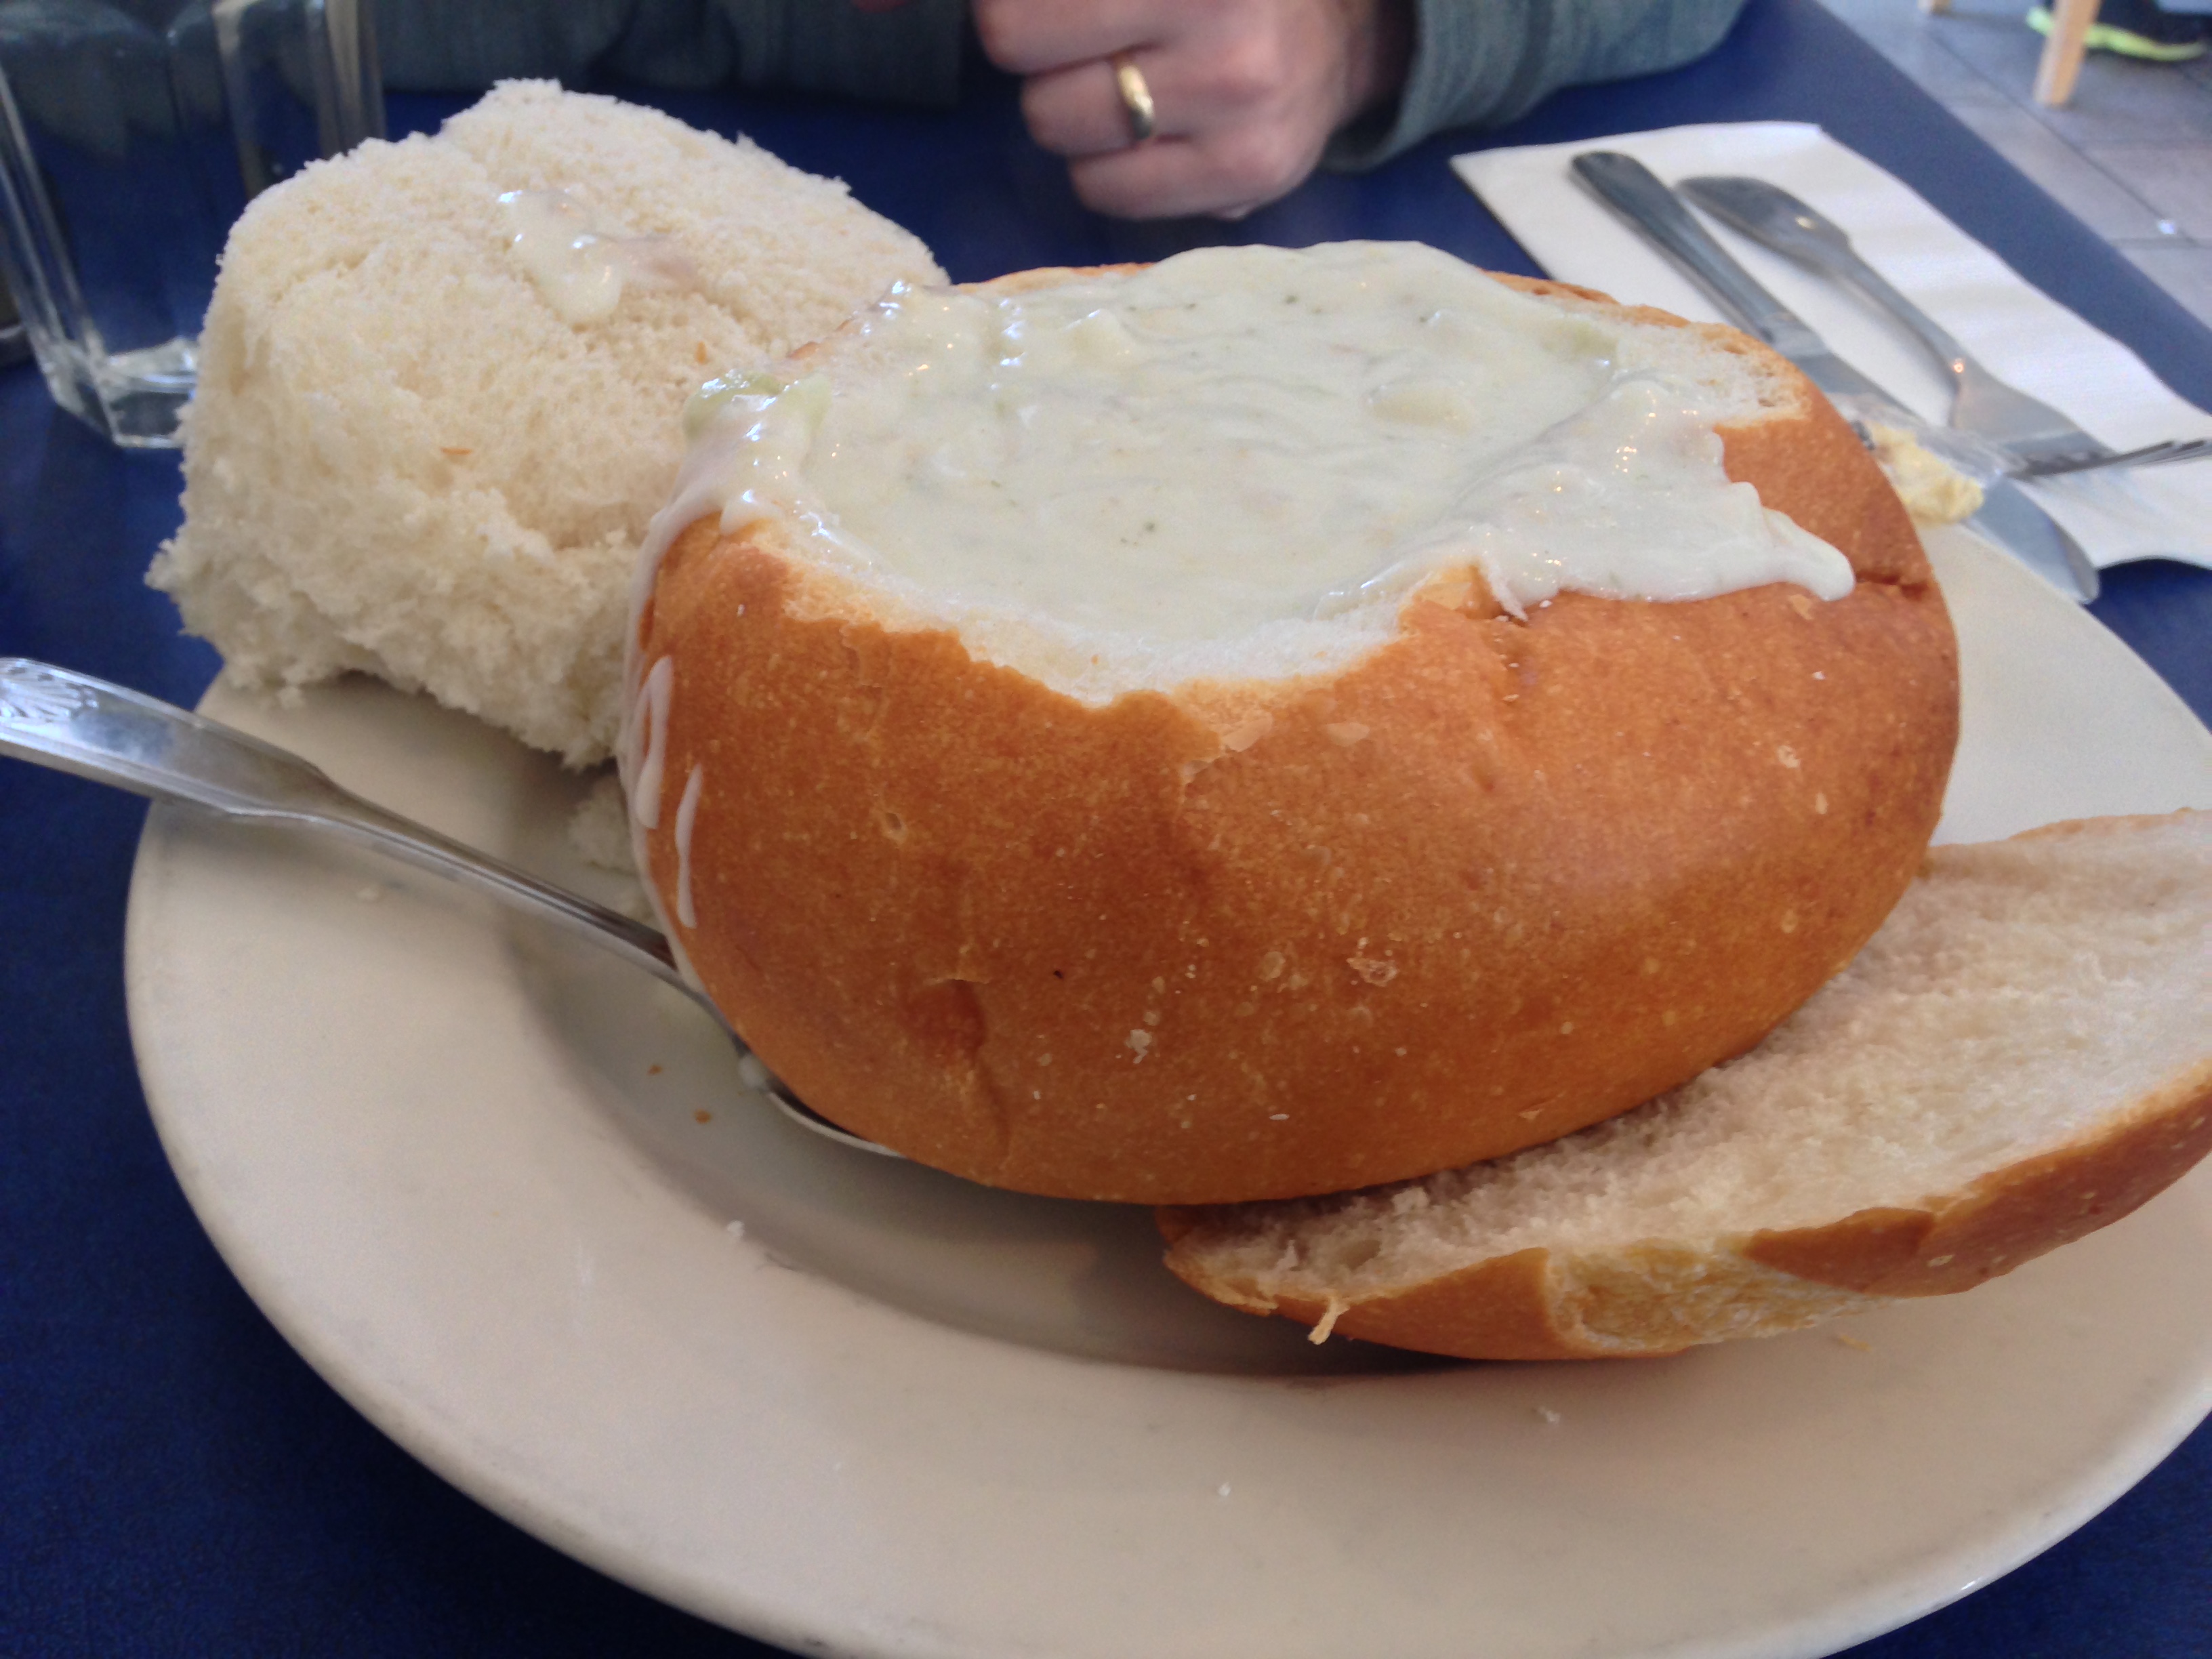
We got hungry and checked out Sea Harvest Fish Market and Restaurant. The area is dotted with plenty of restaurants but we went with the highest rated place on yelp.

The chowder and fried calamari were delicious but my favorite part were the grilled oysters. They were so delicious and fresh.

Oysters Clam Chowder

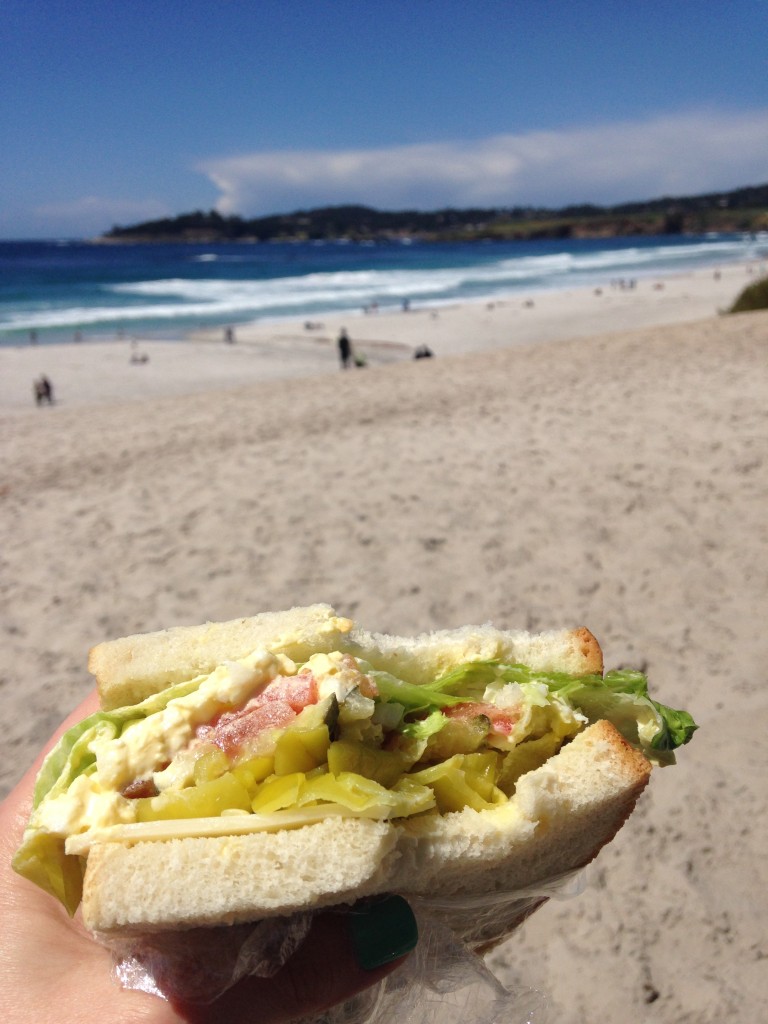
While the hubby was working, I took a walk down to Carmel Beach with a sandwich from Bruno’s. The little deli inside of the grocery store was just what I wanted. They made my egg salad fresh in the back while I waited. How can you not love a sandwich like that with this view?!

Carmel by the beach

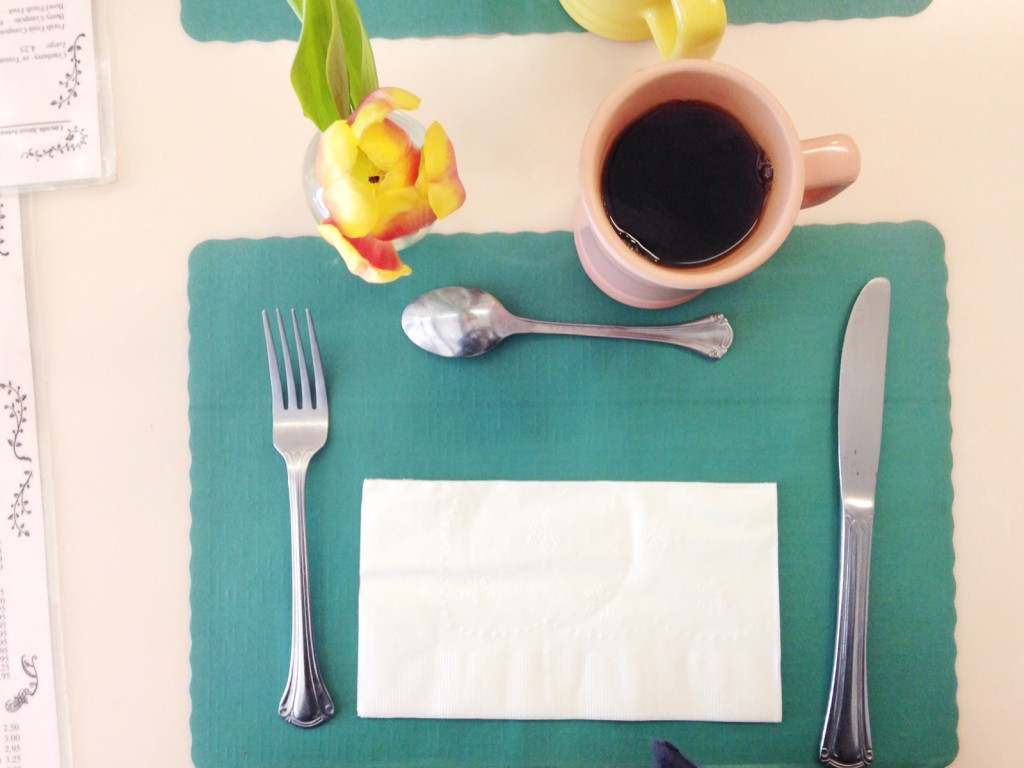
Before we headed back to LA we stopped for a quick breakfast at The Cottage. It reminded me of being in my grandma’s home with the old timey decor and sweet service. I got eggs, fruit and a Kathy cake with berries. The Kathy cake is a must! It totally hit the spot and I definitely recommend this comforting restaurant.

Cottage

On our way to LA we stopped in Santa Barbara so my husband could do a little work. I ventured off and got this from McConnell’s.

McConnell's

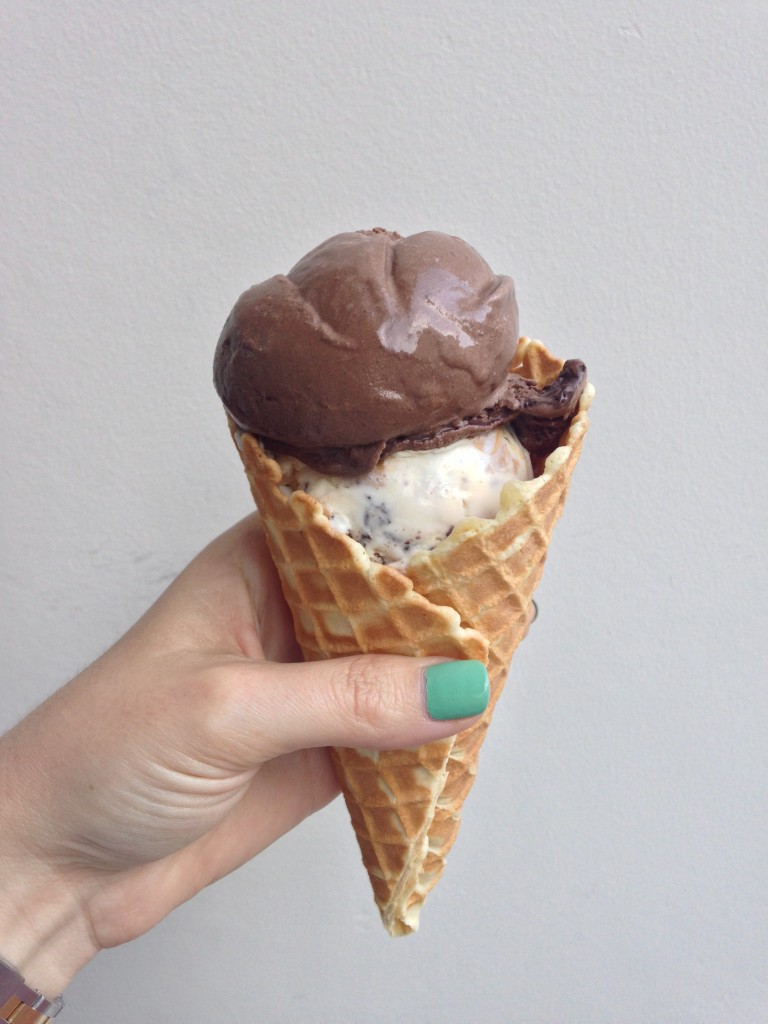
First off, I want to drop everything and live in Santa Barbara. I’m so jealous of everyone living there. Second, omg this ice cream. I waited in a pretty long line in the middle of the day which means it must be an amazing place. I asked for half scoops so I could try as much as possible 🙂 Pictured here is Almond Brittle Chocolate and Double Peanut Butter Chip: worth the wait.

Peace out, Cali. Until next time!

Blueberry Crumb Bars

Blueberry Crumb Bar 5

On most mornings, I drink my healthy smoothie but sometimes I just want something sweet that resembles a muffin. That’s how I came up with these crumb bars. They’re maybe more like a dessert but sufficient enough for breakfast, in my opinion. They have a great spice blend with a hint of cardamom. I really like this spice. I’m not a huge fan of Indian food but this spice which is prevalent in Indian cooking is one of my favorites. I love to combine it, when fitting, in my baked goods. Give it a chance and I promise you’ll fall in love too 🙂

Blueberry Crumb Bar 1 Blueberry Crumb Bar 4
Print Recipe
Blueberry Crumb Bars
Prep Time 15 minutes
Cook Time 40 minutes
Servings
Ingredients
Prep Time 15 minutes
Cook Time 40 minutes
Servings
Ingredients
Instructions
  1. Combine ½ c sugar, baking powder, flour, cinnamon, cardamom, nutmeg, and salt. Mix with whisk. Add lemon zest, juice, vanilla, egg, and mix. Once combined, butter with flour mixture with hands until combined. You can use a standing mixer or pastry cutter to get the texture faster. It will be grainy and not full combined.
  2. In a separate bowl, mix ¼ c sugar and cornstarch. Add blueberries and mix to cover.
  3. In a 13x9 pyrex, cover with cooking spray then add half of the flour mixture and press down. After, add the blueberries and spread evenly. Spread the rest of the flour mixture on top of the blueberries. Bake at 350 convection for about 40 minutes. Let cool before you cut.

Peanut Butter Ganache Cookie Sandwiches

Peanut Butter Cookie 6

The other day I got a call to make a yellow cake with milk chocolate frosting. It had been a while since I’ve made chocolate frosting since I’ve been on my whipped cream cheese kick. It’s literally the best thing I’ve tasted and maybe needed a break from it. I messaged a fellow chef/mentor of mine for some advice. He immediately sent me a whipped chocolate ganache recipe from a textbook. The recipe itself is really simple but I imagined it would be something a bit different.

When I learned the ganache technique in school, there was more chocolate to cream ratio resulting in a thicker ganache. (generally a different recipe to make truffles and such) This recipe has more cream than chocolate which makes it more liquidy. Once cooled then whipped, it’s like chocolate whipped cream! It’s oh so good and can be made with milk or dark chocolate.

Ah hem, long story short, I had extra whipped ganache so I bought the packaged peanut butter cookie mix. I know, this is against my values of scratch made food but it was my quickest option!

Peanut Butter Cookie 1
Peanut Butter Cookie 2

Once the cookies cooled, I piped the ganache on one side then sandwiched the other over it pressing gently. I put them in the fridge until serving them. They will melt and not hold if left at room temp, just fyi. Now, you can eat them right away, like I did 🙂

Peanut Butter Cookie 3
Peanut Butter Cookie 5


Peanut Butter Cookie 4
Print Recipe
Peanut Butter Ganache Cookie Sandwiches
Whipped Chocolate Ganache Frosting
Prep Time 10 minutes
Cook Time 5 minutes
Passive Time 7 hours
Servings
Prep Time 10 minutes
Cook Time 5 minutes
Passive Time 7 hours
Servings
Instructions
  1. Put chocolate in bowl.
  2. Bring heavy cream to a simmer
  3. Pour hot cream over chocolate and let sit for 1 min.
  4. Gently stir to blend, strain and cool.
  5. Cover with plastic wrap and refrigerate over night.
  6. Whip ganache in standing mixer to desired peak.

Oklahoma

Tuckers 1

Last weekend my husband and I went to Oklahoma City for a special college friends wedding. Neither of us had ever been to Oklahoma before but we got some advice before we left. Another good friend of mine is from this town and said hands down we needed to try an onion burger from Tucker’s. So, we made it our mission to try this burger, how ever and when ever we could make it.

Saturday morning we started walking from our hotel exploring downtown, the bombing memorial, and automobile alley (highly recommend).

Zach flying

(That’s my amazing husband, he’s training to be a River dancer, haha, jk!)

At that point, we worked up a pretty good appetite. I checked the map to see where Tucker’s was in relation to us and it was a good 1.5 miles. Uber was 4.5x the price (blah) so we decided to walk…. An hour later we arrived at Tucker’s…(regretting not taking that uber).

The menu was very simple, onion burger, onion burger with cheese, onion turkey burger, the choice of sides and fries. Pretty simple but that’s how you keep things good!

Tuckers 2 Tuckers 3

Man, that burger was so so yummy! I love grilled onions and they were perfectly thin cut and grilled to perfection. I could tell they handmade the beef patties there too, so fresh. Another unique item was the grilled jalapenos which were a nice spicy addition! We had no idea what to expect from Oklahoma and it was a pleasant surprise. Oh and we took an uber back to the hotel with our full bellies ’cause we deserved it! 🙂

Black Bean & Chickpea Chili

Bean chili 1

When I’m making menu’s for my customers I like to think outside of the box. What can my customers only get from me and not take out? This is the challenge that I struggle with weekly when I make my menu’s. Not to mention following all of their likes and dislikes. On an occasion, I like to throw in a vegetarian dish. Well, almost vegetarian since I love my good ol’ chicken stock. A friend of mine who is a dietician helps me out on occasion when I’m suffering from menu block. She’s obsessed with vegetarian recipes so she’s the inspiration for this one 🙂

When I first tasted this recipe after making it, I ate it for lunch and dinner 3 days straight. Seriously. It has the perfect amount of spice and the beans are so filling. It’s really a healthy comfort food and highly recommend making it. My customers loved it too!

Bean chili 3
Print Recipe
Black Bean & Chickpea Chili
Recipe adapted from Love and Lemons
Servings
4 people
Ingredients
Ingredients
Servings
4 people
Ingredients
Ingredients
Instructions
  1. Heat oil in a large pot over medium heat. Add chopped onion, salt & pepper and stir. Cook until the onion is slightly translucent then add the garlic and peppers. Stir and cook until soft.
  2. Add the canned tomatoes and the chicken stock. Then add the black beans, chickpeas, adobo sauce, corn and seasonings. Cover, reduce heat to low, and cook for 25 more minutes, stirring occasionally.
  3. Taste and adjust seasonings adding more salt and pepper.
  4. Serve with toppings of your choice. Chill the leftovers and store in the fridge for up to 5 days.
Recipe Notes

*To make vegetarian: swap the chicken stock for water or vegetable stock

Super Cereal Smoothie Bowl

Super Cereal Smoothie Bowl

I spend a good amount of time researching to get inspired with new recipes and ideas. I came across a grainy, seedy all natural breakfast cereal recipe and had to try it. Surprisingly, it keeps me full for hours until lunch time!

Every morning I make some kind of berry variation smoothie. It never fills me up and I’m hungry in an hour. So this morning, I put the cooked super cereal in the bowl and tilted it then poured in my morning smoothie= morning super cereal smoothie bowl! The hot cereal mixed with the cold smoothie was just perfect, I highly recommend making these 2 recipes for your next breakfast.

Print Recipe
Super Cereal Smoothie Bowl
Berry Banana Soothie
Prep Time 5 minutes
Servings
1
Ingredients
Prep Time 5 minutes
Servings
1
Ingredients
Instructions
  1. Blend until smooth

Spinach & Butternut Squash Lasagna

Lasagna 
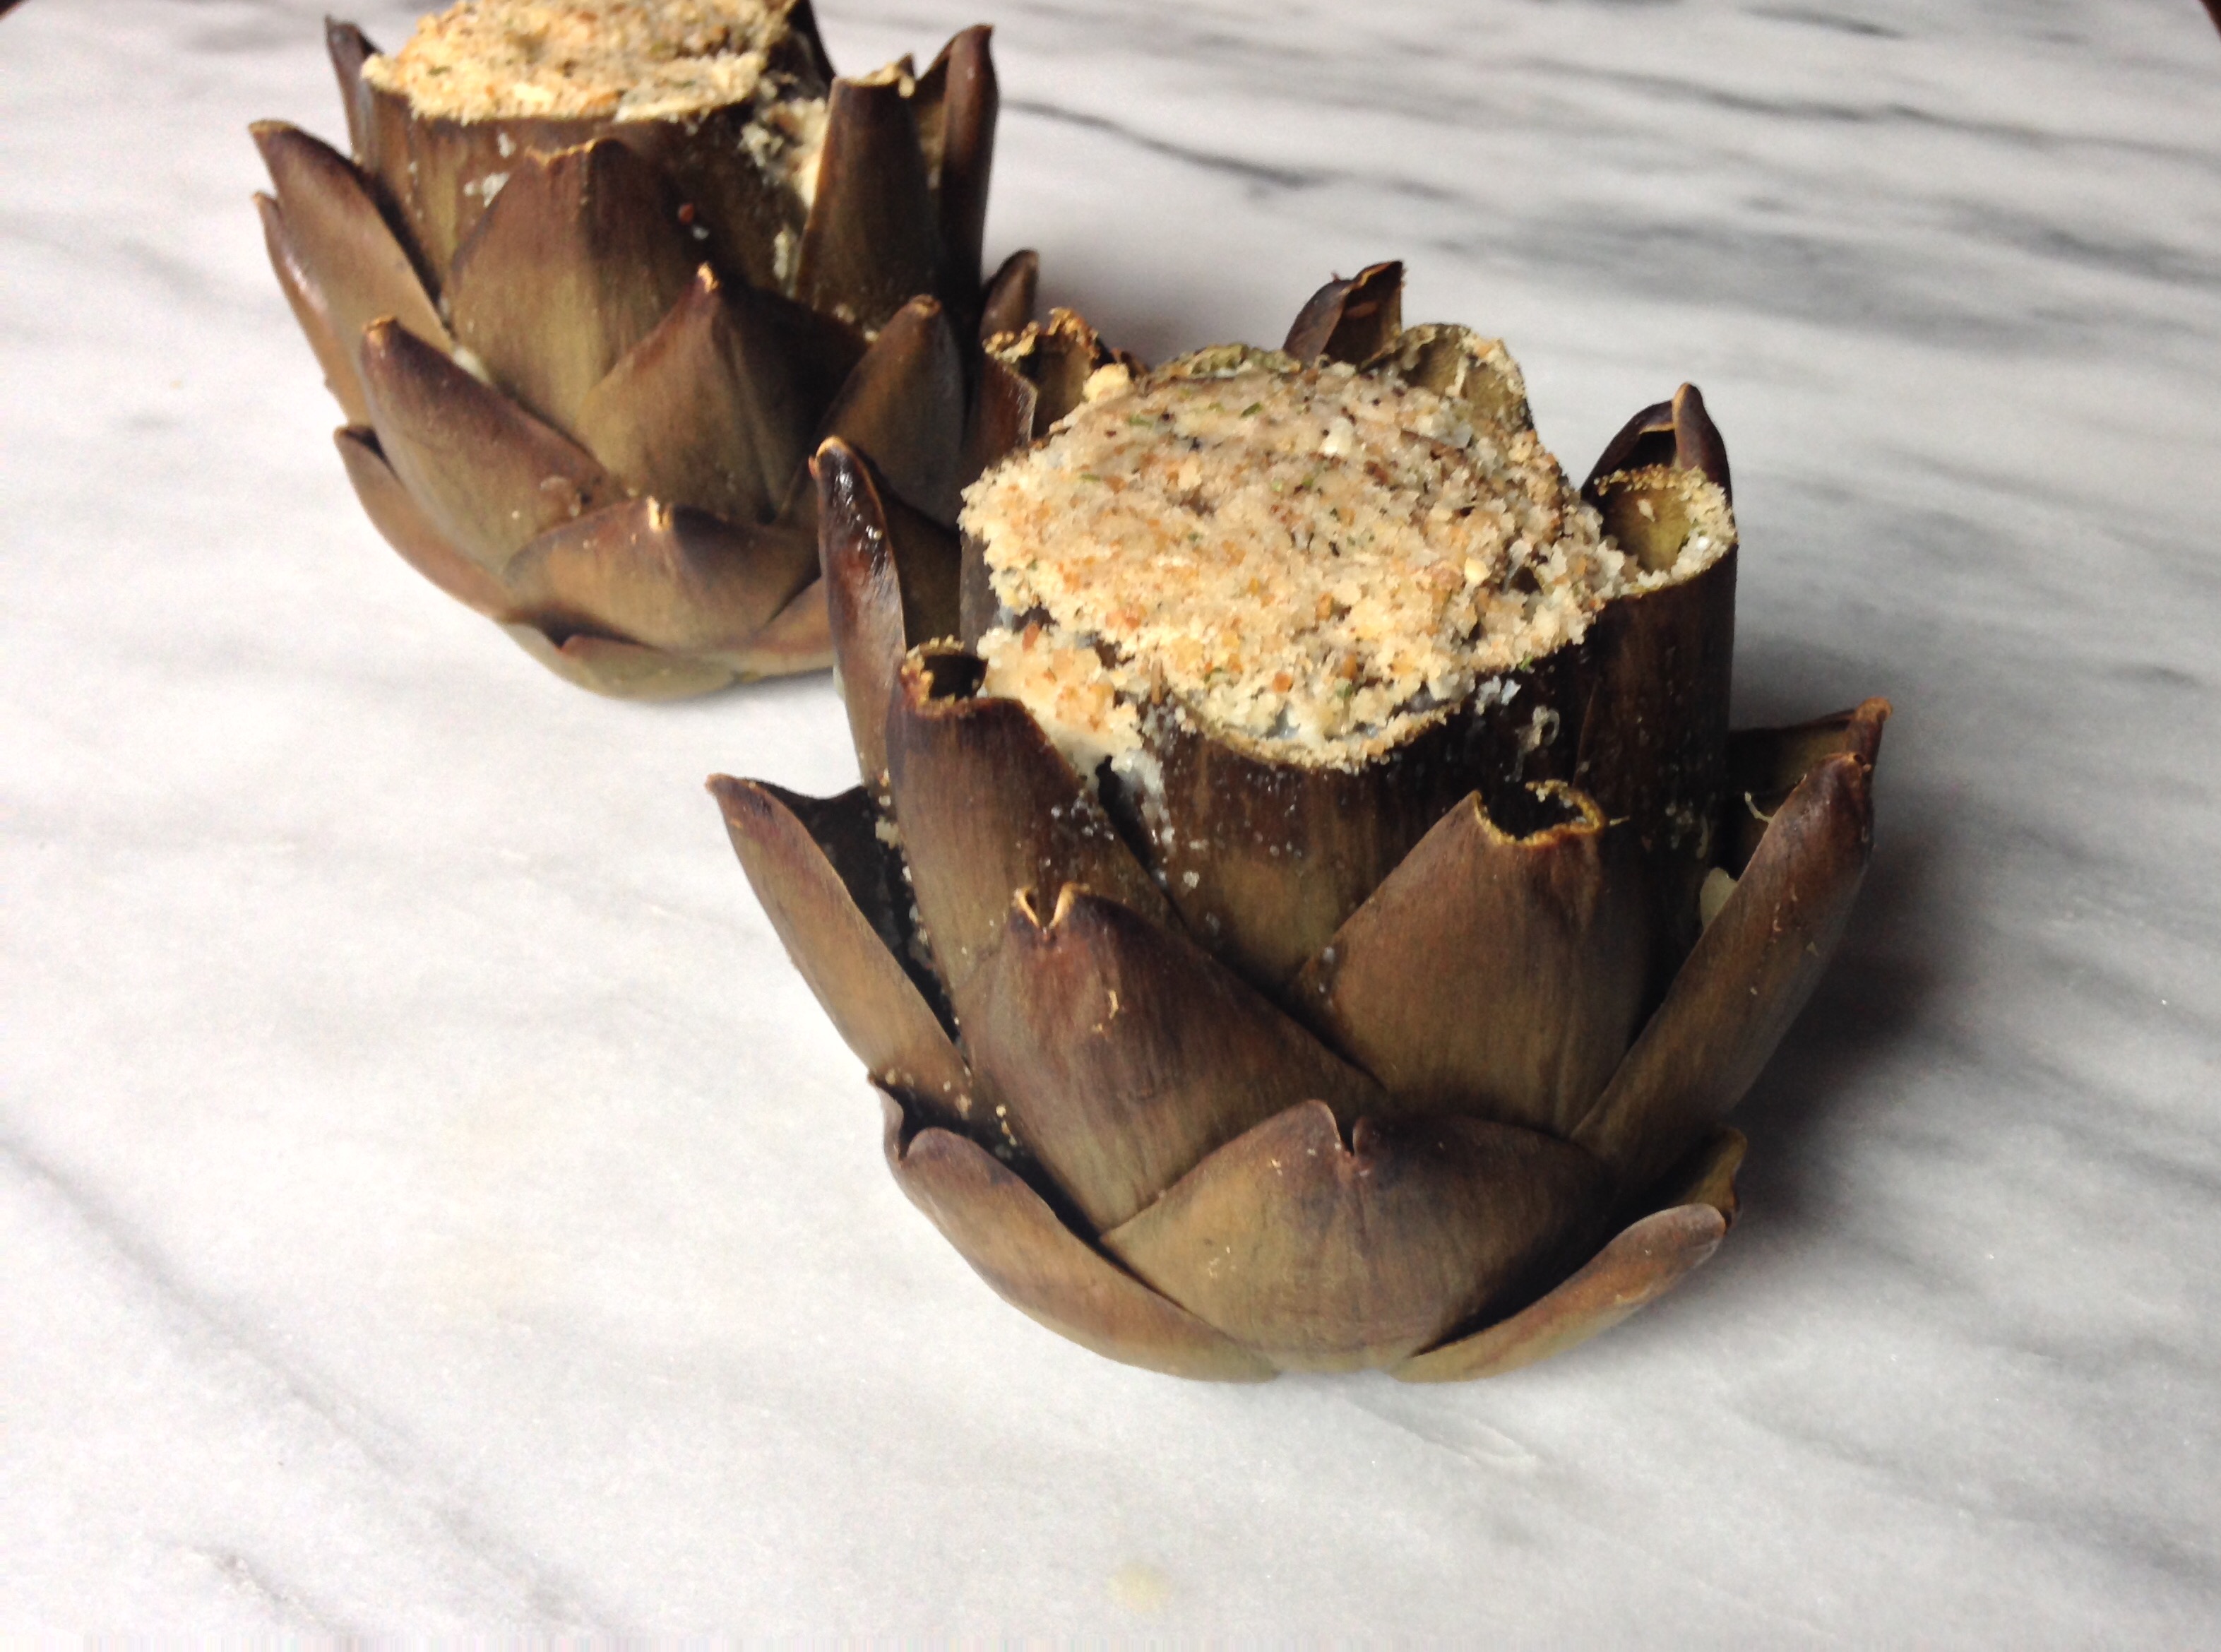
Sometimes I like to partake in Meat-less Monday’s and that’s where the idea for this recipe came from. I’m over the typical bell peppers, onions and mushrooms as the main vegetarian option and I wanted to think of something extra yummy and slightly sweet.  Spinach and roasted butternut squash was the perfect substitute.

I frequent a certain area of town and pass a place called Fabio’s multiple times a week. I had never been in but before making this recipe, I made a quick stop to check it out. I knew they made fresh pasta and needed to see what exactly they offered. The owner was so warm and accommodating. He even cut lasagna pasta sheets to the size of my pans. I will never turn back to the hard dried lasagna sheets again! I’m sticking with fresh all the way 🙂

Below is my best marinara recipe. I was a little hesitant to share but I’ve come to grips that the world needs this recipe. While in culinary school, I interned at a local restaurant, Mockingbird Bistro. The cooks and chef put a lot of love into their marinara sauce and I could taste the complexity of flavors. Taking the time to brown the (mirepoix) celery, carrot and onions makes such a difference in flavor. Each step adds another dimension to the flavor, that’s why I’m in love with this recipe. Also, I took a cooking class in Italy and a lot of the methods were similar and solidified my feelings about it.

Once the lasagna was baked, all of the flavors combined into the best veggie lasagna I have ever made. The corners got a little crispy but I was able to cut around it. The inside was cheesy, sweet and slightly salty- all of my favorite flavors.

Lasagna


Print Recipe
Spinach & Butternut Squash Lasagna
Prep Time 15 minutes
Cook Time 82 minutes
Passive Time 15 minutes
Servings
Ingredients
Ingredients
Best Marinara Sauce
Prep Time 15 minutes
Cook Time 82 minutes
Passive Time 15 minutes
Servings
Ingredients
Ingredients
Best Marinara Sauce
Instructions
Spinach & Butternut Squash Lasagna
  1. Preheat oven to 400 and roast butternut squash for about 30 minutes or until cooked through.
  2. Mix ricotta, ¾ c mozzarella, ¼ c parmesan, salt, pepper and oregano in bowl and set aside.
  3. Reduce heat to 350 and coat 9x13 pan with cooking spray.
  4. Spread 1/2 c tomato sauce (recipe below) on bottom and top with 3 noodles to cover (or 1 if using fresh). Top the noodles with half butternut squash and half spinach. Dollop half ricotta mixture on top then add 1 cup tomato sauce on top. Repeat this layer one more time, pressing down on the filling as you add the layer. Put the remaining sheet(s) on top. Spread the remaining sauce on top then add ¾ c mozzarella and ¼ c parmesan. Cover with foil with cooking spray on the inside.
  5. Bake for 50 minutes. Remove foil and continue to bake 7 more minutes so the cheese browns. Let stand for 15 minutes before serving.
Best Marinara Sauce
  1. Sauté onion, garlic and shallot in olive oil until fragrant. Add celery and carrots. Cook until veggies are brown and soft. A few pinches of salt and pepper along the way to help relieve moisture. Deglaze pan with red wine, scraping the bottom of the pan. Once the liquid has evaporated, add the bay leaf, thyme, tomato paste, and tomato sauce. Stir then cover and simmer for 20 or so minutes. Taste and add salt or pepper. Now, add heavy cream or milk. This will make the sauce less acidic and extra delicious. Stir and cook on low for 5 minutes.
  2. Adaptation: put onion garlic, shallot, carrot, and celery in food processor and grind until there are no visible pieces. Brown this in olive oil for less chunky sauce. Add water if you like it less thick.